A rivet is a permanent mechanical fastener. Before being installed, a rivet consists of a smooth cylindrical shaft with a head on one end. The end opposite to the head is called the tail. On installation, the rivet is placed in a punched or drilled hole, and the tail is upset, or bucked (i.e., deformed), so that it expands to about 1.5 times the original shaft diameter, holding the rivet in place. In other words, the pounding or pulling creates a new "head" on the other end by smashing the "tail" material flatter, resulting in a rivet that is roughly a dumbbell shape. To distinguish between the two ends of the rivet, the original head is called the factory head and the deformed end is called the shop head or buck-tail.
Because there is effectively a head on each end of an installed rivet, it can support tension loads. However, it is much more capable of supporting shear loads (loads perpendicular to the axis of the shaft).
Fastenings used in traditional wooden boat building, such as copper nails and clinch bolts, work on the same principle as the rivet but were in use long before the term rivet was introduced and, where they are remembered, are usually classified among nails and bolts respectively.
Types
There are a number of types of rivets, designed to meet different cost, accessibility, and strength requirements:
Solid/round head rivets
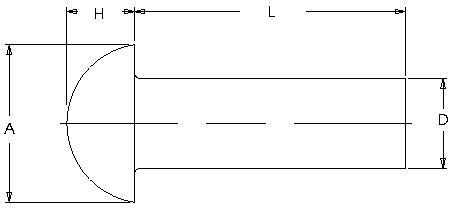
A typical technical drawing of a universal head solid rivet
Solid rivets are one of the oldest and most reliable types of fasteners, having been found in archaeological findings dating back to the Bronze Age. Solid rivets consist simply of a shaft and head that are deformed with a hammer or rivet gun. A rivet compression or crimping tool can also deform this type of rivet. This tool is mainly used on rivets close to the edge of the fastened material, since the tool is limited by the depth of its frame. A rivet compression tool does not require two people, and is generally the most foolproof way to install solid rivets.
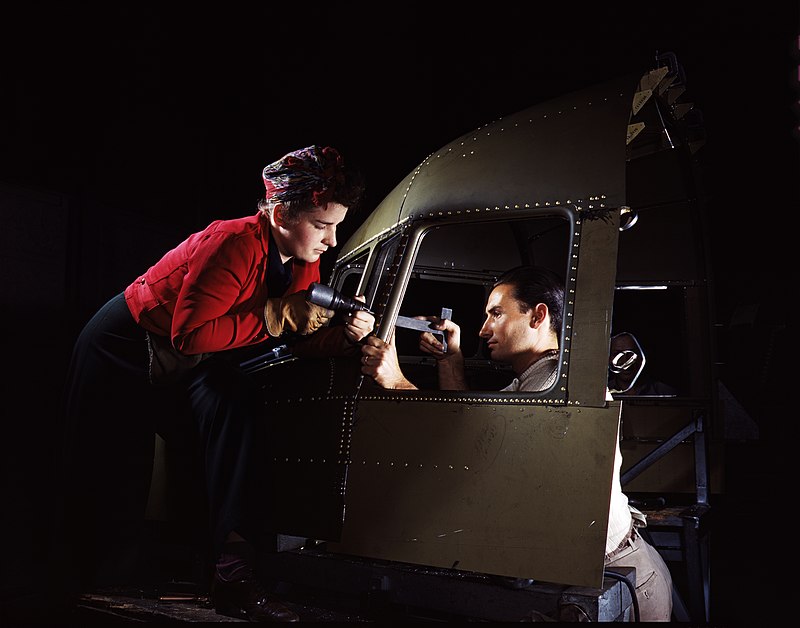
Riveting team working on the cockpit shell of a C-47 transport at the plant of North American Aviation. The woman on the left operates an air hammer, while the man on the right holds a bucking bar.
Solid rivets are used in applications where reliability and safety count. A typical application for solid rivets can be found within the structural parts of aircraft. Hundreds of thousands of solid rivets are used to assemble the frame of a modern aircraft. Such rivets come with rounded (universal) or 100° countersunk heads. Typical materials for aircraft rivets are aluminium alloys (2017, 2024, 2117, 7050, 5056, 55000, V-65), titanium, and nickel-based alloys (e.g., Monel). Some aluminum alloy rivets are too hard to buck and must be softened by solution treating (precipitation hardening) prior to being bucked. "Ice box" aluminum alloy rivets harden with age, and must likewise be annealed and then kept at sub-freezing temperatures (hence the name "ice box") to slow the age-hardening process. Steel rivets can be found in static structures such as bridges, cranes, and building frames.
The setting of these fasteners requires access to both sides of a structure. Solid rivets are driven using a hydraulically, pneumatically, or electromagnetically actuated squeezing tool or even a handheld hammer. Applications where only one side is accessible require "blind" rivets.
Solid rivets are also used by some artisans in the construction of modern reproduction of medieval armour, jewellery and metal couture.
High-strength structural steel rivets
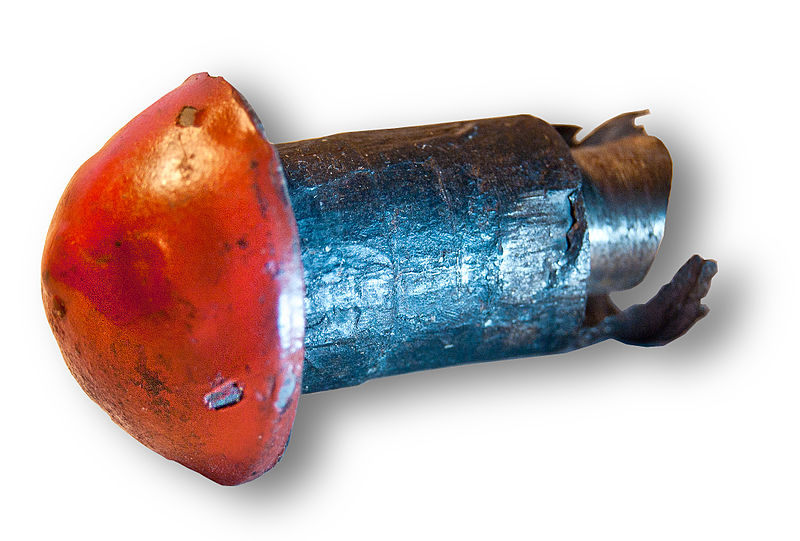
An original structural steel rivet from the Golden Gate Bridge (1937). Removed and replaced c. 2000 during work to reinforce the structure to resist seismic loads
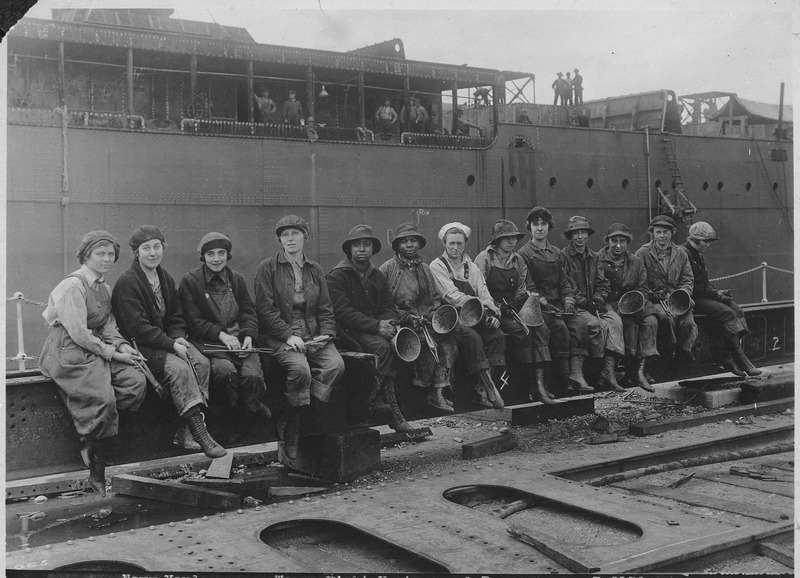
Women rivet heaters, with their tongs and catching buckets, Puget Sound Navy Yard, May 1919
Until relatively recently, structural steel connections were either welded or riveted. High-strength bolts have largely replaced structural steel rivets. Indeed, the latest steel construction specifications published by AISC (the 14th Edition) no longer covers their installation. The reason for the change is primarily due to the expense of skilled workers required to install high strength structural steel rivets. Whereas two relatively unskilled workers can install and tighten high strength bolts, it normally takes four skilled workers to install rivets (warmer, catcher, holder, basher).
At a central location near the areas being riveted, a furnace was set up. Rivets were placed in the furnace and heated to glowing hot (often to white hot) so that they were more malleable and easily deformed. The rivet warmer or cook used tongs to remove individual rivets and throw them to a catcher stationed near the joints to be riveted. The catcher (usually) caught the rivet in a leather or wooden bucket with an ash-lined bottom. The catcher inserted the rivet into the hole to be riveted, then quickly turned to catch the next rivet. The holder up or holder on would hold a heavy rivet set or dolly or another (larger) pneumatic jack against the round head of the rivet, while the riveter (sometimes two riveters) applied a hammer or pneumatic rivet hammer to the unformed head, making it mushroom tightly against the joint in its final domed shape. Alternatively the buck is hammered more or less flush with the structure in a counter sunk hole. Before the use of pneumatic hammers, e.g. in the construction of RMS Titanic, the man who hammered the rivet was known as the "basher". Upon cooling, the rivet contracted and exerted further force, tightening the joint.
The last commonly used high strength structural steel rivets were designated ASTM A502 Grade 1 rivets.
Such riveted structures may be insufficient to resist seismic loading from earthquakes if the structure was not engineered for such forces, a common problem of older steel bridges. This is because a hot rivet cannot be properly heat treated to add strength and hardness. In the seismic retrofit of such structures it is common practice to remove critical rivets with an oxygen torch, precision ream the hole, then insert a machined and heat treated bolt.
Semi-tubular rivets
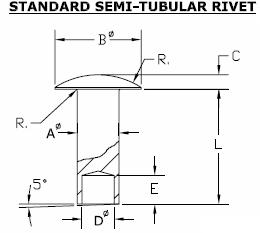
A typical technical drawing of an oval head semi-tubular rivet
Semi-tubular rivets (also known as tubular rivets) are similar to solid rivets, except they have a partial hole (opposite the head) at the tip. The purpose of this hole is to reduce the amount of force needed for application by rolling the tubular portion outward. The force needed to apply a semitubular rivet is about 1/4 of the amount needed to apply a solid rivet. Tubular rivets are sometimes preferred for pivot points (a joint where movement is desired) since the swelling of the rivet is only at the tail. The type of equipment used to apply semi-tubular rivets range from prototyping tools to fully automated systems. Typical installation tools (from lowest to highest price) are hand set, manual squeezer, pneumatic squeezer, kick press, impact riveter, and finally PLC-controlled robotics. The most common machine is the impact riveter and the most common use of semitubular rivets is in lighting, brakes, ladders, binders, HVAC duct work, mechanical products, and electronics. They are offered from 1/16-inch (1.6 mm) to 3/8-inch (9.5 mm) in diameter (other sizes are considered highly special) and can be up to 8 inches (203 mm) long. A wide variety of materials and platings are available, most common base metals are steel, brass, copper, stainless, aluminum and most common platings are zinc, nickel, brass, tin. Tubular rivets are normally waxed to facilitate proper assembly. An installed tubular rivet has a head on one side, with a rolled over and exposed shallow blind hole on the other.
Blind rivets
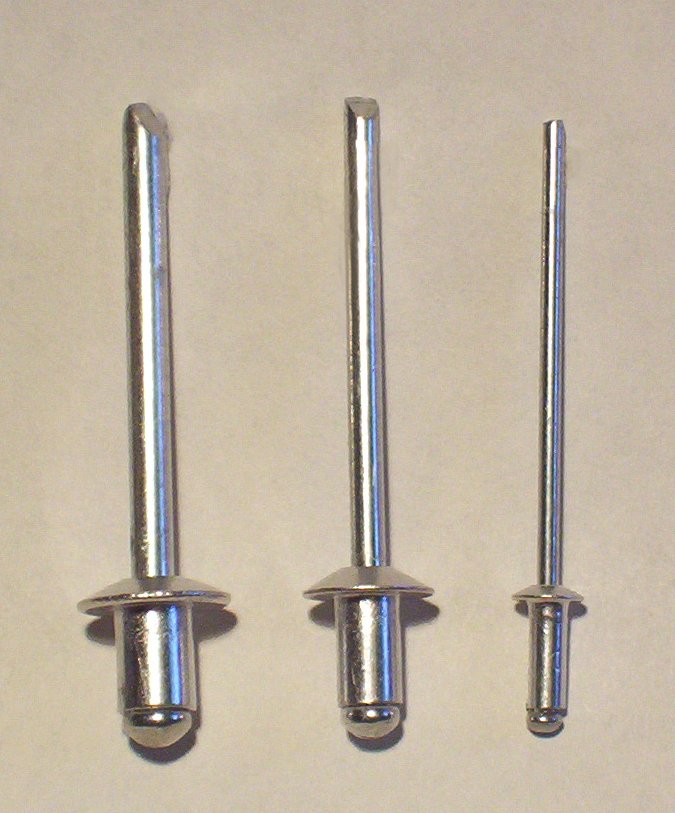
Three aluminium blind rivets: 1/8", 3/32", and 1/16"

Speed in the Workshops - Speed in the Air, March 1944 Geo Tucker Eyelet Co. advert for pop rivets, featuring Spitfire aircraft
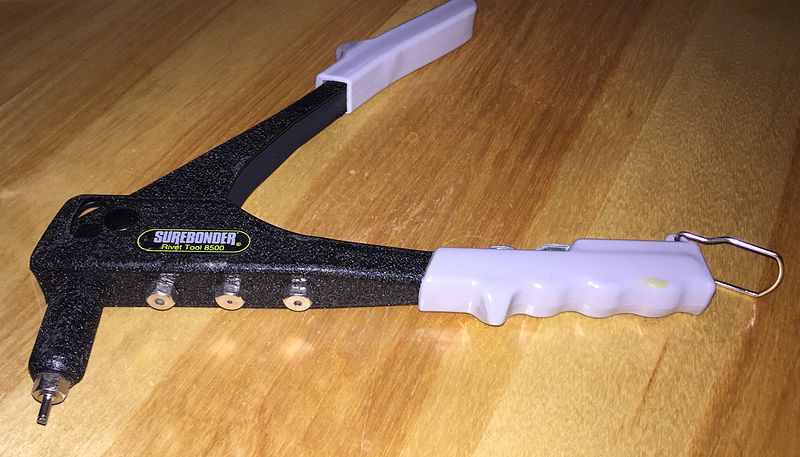
Pop rivet gun with rivet inserted
Blind rivets, commonly referred to as "pop" rivets (POP is the brand name of the original manufacturer, now owned by Stanley Engineered Fastening, a division of Stanley Black & Decker) are tubular and are supplied with a nail-like mandrel through the center which has a "necked" or weakened area near the head. The rivet assembly is inserted into a hole drilled through the parts to be joined and a specially designed tool is used to draw the mandrel through the rivet. The compression force between the head of the mandrel and the tool expands the diameter of the tube throughout its length, locking the sheets being fastened if the hole was the correct size. The head of the mandrel also expands the blind end of the rivet to a diameter greater than that of the drilled hole, compressing the fastened sheets between the head of the rivet and the head of the mandrel. At a predetermined tension, the mandrel breaks at the necked location. With open tubular rivets, the head of the mandrel may or may not remain embedded in the expanded portion of the rivet, and can come loose at a later time. More expensive closed-end tubular rivets are formed around the mandrel so the head of the mandrel is always retained inside the blind end after installation. "Pop" rivets can be fully installed with access to only one side of a part or structure.
Prior to the invention of blind rivets, installation of a rivet typically required access to both sides of the assembly: a rivet hammer on one side and a bucking bar on the other side. In 1916, Royal Navy reservist and engineer Hamilton Neil Wylie filed a patent for an "improved means of closing tubular rivets" (granted May 1917). In 1922 Wylie joined the British aircraft manufacturer Armstrong-Whitworth Ltd to advise on metal construction techniques; here he continued to develop his rivet design with a further 1927 patent that incorporated the pull-through mandrel, and allowed the rivet to be used blind. By 1928, the George Tucker Eyelet company, of Birmingham, England, produced a "cup" rivet based on the design. It required a separate GKN mandrel and the rivet body to be hand assembled prior to use for the building of the Siskin III aircraft. Together with Armstrong-Whitworth, the Geo. Tucker Co. further modified the rivet design to produce a one-piece unit incorporating mandrel and rivet. This product was later developed in aluminium and trademarked as the "POP" rivet. The United Shoe Machinery Co. produced the design in the U.S. as inventors such as Carl Cherry and Lou Huck experimented with other techniques for expanding solid rivets.
They are available in flat head, countersunk head, and modified flush head with standard diameters of 1/8, 5/32 and 3/16 inch. Blind rivets are made from soft aluminum alloy, steel (including stainless steel), copper, and Monel.
There are also structural blind rivets, which are designed to take shear and tensile loads.
Internally and externally locked structural blind rivets can be used in aircraft applications because, unlike other types of blind rivets, the locked mandrels cannot fall out and are watertight. Since the mandrel is locked into place, they have the same or greater shear-load-carrying capacity as solid rivets and may be used to replace solid rivets on all but the most critical stressed aircraft structures.
The typical assembly process requires the operator to install the rivet in the nose of the tool by hand and then actuate the tool. However, in recent years automated riveting systems have become popular in an effort to reduce assembly costs and repetitive disorders. The cost of such tools range from US$1,500 for autofeed pneumatics to US$50,000 for fully robotic systems.
While structural blind rivets using a locked mandrel are common, there are also aircraft applications using "non-structural" blind rivets where the reduced, but still predictable, strength of the rivet without the mandrel is used as the design strength. A method popularized by Chris Heintz of Zenith Aircraft uses a common flat-head (countersunk) rivet which is drawn into a specially machined nosepiece that forms it into a round head rivet, taking up much of the variation inherent in hole size found in amateur aircraft construction. Aircraft designed with these rivets use rivet strength figures measured with the mandrel removed.
Oscar rivets
Oscar rivets are similar to blind rivets in appearance and installation, but have splits (typically three) along the hollow shaft. These splits cause the shaft to fold and flare out (similar to the wings on a toggle bolt's nut) as the mandrel is drawn into the rivet. This flare (or flange) provides a wide bearing surface that reduces the chance of rivet pull-out. This design is ideal for high vibration applications where the back surface is inaccessible.
A version of the Oscar rivet is the Olympic rivet which uses an aluminum mandrel that is drawn into the rivet head. After installation, the head and mandrel are shaved off flush resulting in an appearance closely resembling a brazier head driven rivet. They are used in repair of Airstream trailers to replicate the look of the original rivets.
Drive rivet
A drive rivet is a form of blind rivet that has a short mandrel protruding from the head that is driven in with a hammer to flare out the end inserted in the hole. This is commonly used to rivet wood panels into place since the hole does not need to be drilled all the way through the panel, producing an aesthetically pleasing appearance. They can also be used with plastic, metal, and other materials and require no special setting tool other than a hammer and possibly a backing block (steel or some other dense material) placed behind the location of the rivet while hammering it into place. Drive rivets have less clamping force than most other rivets. Drive screws, possibly another name for drive rivets, are commonly used to hold nameplates into blind holes. They typically have spiral threads that grip the side of the hole.
Flush rivet
A flush rivet is used primarily on external metal surfaces where good appearance and the elimination of unnecessary aerodynamic drag are important. A flush rivet takes advantage of a countersink hole; they are also commonly referred to as countersunk rivets. Countersunk or flush rivets are used extensively on the exterior of aircraft for aerodynamic reasons such as reduced drag and turbulence. Additional post-installation machining may be performed to perfect the airflow.
Friction-lock rivet
These resemble an expanding bolt except the shaft snaps below the surface when the tension is sufficient. The blind end may be either countersunk ('flush') or dome shaped.
One early form of blind rivet that was the first to be widely used for aircraft construction and repair was the Cherry friction-lock rivet. Originally, Cherry friction-locks were available in two styles, hollow shank pull-through and self-plugging types. The pull-through type is no longer common; however, the self-plugging Cherry friction-lock rivet is still used for repairing light aircraft.
Cherry friction-lock rivets are available in two head styles, universal and 100 degree countersunk. Furthermore, they are usually supplied in three standard diameters, 1/8, 5/32 and 3/16 inch.
A friction-lock rivet cannot replace a solid shank rivet, size for size. When a friction-lock is used to replace a solid shank rivet, it must be at least one size larger in diameter because the friction-lock rivet loses considerable strength if its center stem falls out due to vibrations or damage.
Self-piercing rivets
Self-pierce riveting (SPR) is a process of joining two or more materials using an engineered rivet. Unlike solid, blind and semi-tubular rivets, self-pierce rivets do not require a drilled or punched hole.
SPRs are cold forged to a semi-tubular shape and contain a partial hole to the opposite end of the head. The end geometry of the rivet has a chamfered poke that helps the rivet pierce the materials being joined. A hydraulic or electric servo rivet setter drives the rivet into the material, and an upsetting die provides a cavity for the displaced bottom sheet material to flow. The SPR process is described in here SPR process.
The self-pierce rivet fully pierces the top sheet material(s) but only partially pierces the bottom sheet. As the tail end of the rivet does not break through the bottom sheet it provides a water or gas-tight joint. With the influence of the upsetting die, the tail end of the rivet flares and interlocks into the bottom sheet forming a low profile button.
Rivets need to be harder than the materials being joined. they are heat treated to various levels of hardness depending on the material's ductility and hardness. Rivets come in a range of diameters and lengths depending on the materials being joined; head styles are either flush countersunk or pan heads.
Depending on the rivet setter configuration, i.e. hydraulic, servo, stroke, nose-to-die gap, feed system etc., cycle times can be as quick as one second. Rivets are typically fed to the rivet setter nose from tape and come in cassette or spool form for continuous production.
Riveting systems can be manual or automated depending on the application requirements; all systems are very flexible in terms of product design and ease of integration into a manufacturing process.
SPR joins a range of dissimilar materials such as steel, aluminum, plastics, composites and pre-coated or pre-painted materials. Benefits include low energy demands, no heat, fumes, sparks or waste and very repeatable quality.
Sizes
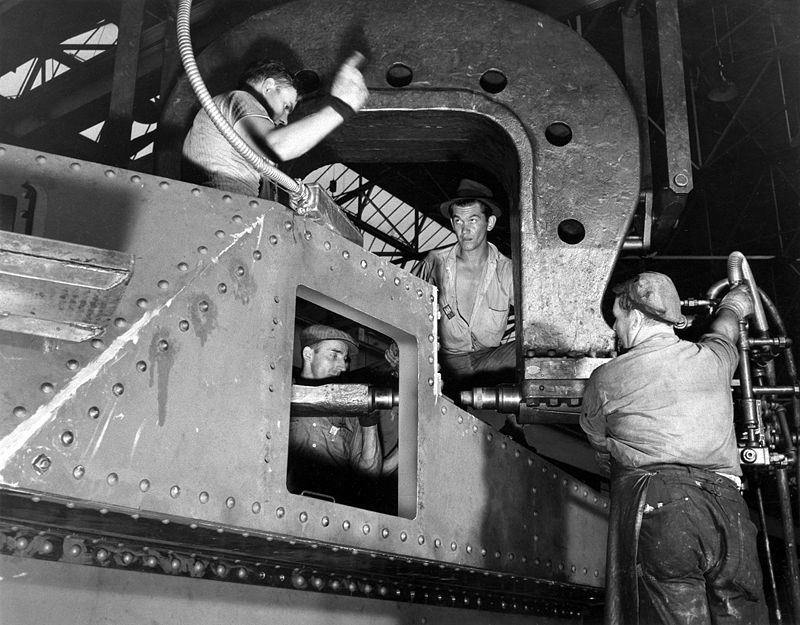
Installing rivets on M3 tank hull
Rivets come in both inch series and metric series:
- Imperial units (fractions of inches) with diameters such as 1/8" or 5/16".
- Système international or SI units with diameters such as 3 mm, 8 mm.
The main official standards relate more to technical parameters such as ultimate tensile strength and surface finishing than physical length and diameter.
Imperial
Rivet diameters are commonly measured in 1⁄32-inch increments and their lengths in 1⁄16-inch increments, expressed as "dash numbers" at the end of the rivet identification number. A "dash 3 dash 4" (XXXXXX-3-4) designation indicates a 3⁄32-inch diameter and 4⁄16-inch (or 1⁄4-inch) length. Some rivets lengths are also available in half sizes, and have a dash number such as –3.5 (7⁄32 inch) to indicate they are half-size. The letters and digits in a rivet's identification number that precede its dash numbers indicate the specification under which the rivet was manufactured and the head style. On many rivets, a size in 32nds may be stamped on the rivet head. Other makings on the rivet head, such as small raised or depressed dimples or small raised bars indicate the rivet's alloy.
To become a proper fastener, a rivet should be placed in hole ideally 4–6 thousandths of an inch larger in diameter. This allows the rivet to be easily and fully inserted, then setting allows the rivet to expand, tightly filling the gap and maximizing strength.
Metric
Rivet diameters and lengths are measured in millimeters. Conveniently, the rivet diameter relates to the drill required to make a hole to accept the rivet, rather than the actual diameter of the rivet, which is slightly smaller. This facilitates the use of a simple drill-gauge to check both rivet and drill are compatible. For general use, diameters between 2 mm – 20 mm and lengths from 5 mm – 50 mm are common. The design-type, material and any finish is usually expressed in plain language (often English).
Applications

A riveted buffer beam on a steam locomotive

A riveted truss bridge over the Orange River

Detail of a 1941 riveted ship hull, with the rivets clearly visible
Impact method for solid rivet and semitubular rivets
Before welding techniques and bolted joints were developed, metal framed buildings and structures such as the Eiffel Tower, Shukhov Tower and the Sydney Harbour Bridge were generally held together by riveting, as were automobile chassis. Riveting is still widely used in applications where light weight and high strength are critical, such as in an aircraft. Many sheet-metal alloys are preferably not welded as deformation and modification of material properties can occur.
A large number of countries used rivets in the construction of armored tanks during World War II, including the M3 Lee (General Grant) manufactured in the United States. However, many countries soon learned that rivets were a large weakness in tank design, since if a tank was hit by a large projectile it would dislocate the rivets and they would fly around the inside of the tank and injure or kill the crew, even if the projectile did not penetrate the armor. Some countries such as Italy, Japan, and Britain used rivets in some or all of their tank designs throughout the war for various reasons, such as lack of welding equipment or inability to weld very thick plates of armor effectively.
Blind rivets are used almost universally in the construction of plywood road cases.
Common but more exotic uses of rivets are to reinforce jeans and to produce the distinctive sound of a sizzle cymbal.
Joint analysis
The stress and shear in a rivet is analyzed like a bolted joint. However, it is not wise to combine rivets with bolts and screws in the same joint. Rivets fill the hole where they are installed to establish a very tight fit (often called interference fit). It is difficult or impossible to obtain such a tight fit with other fasteners. The result is that rivets in the same joint with loose fasteners carry more of the load—they are effectively more stiff. The rivet can then fail before it can redistribute load to the other loose fit fasteners like bolts and screws. This often causes catastrophic failure of the joint when the fasteners unzip. In general, a joint composed of similar fasteners is the most efficient because all fasteners reach capacity simultaneously.
Installation
Solid and semi tubular rivets
There are several methods for installing solid rivets.
- Manual with hammer and handset or bucking bar
- Pneumatic hammers
- Handheld squeezers
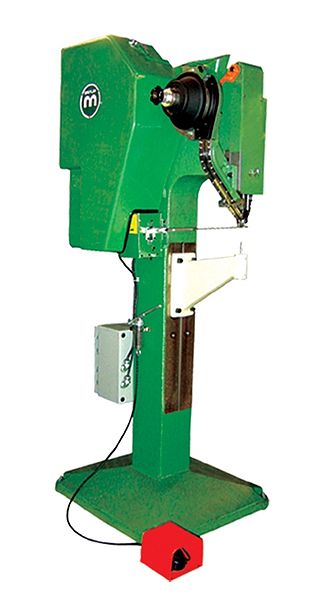
- Riveting machines
- Pin hammer, rivet set
Rivets small enough and soft enough are often bucked. In this process the installer places a rivet gun against the factory head and holds a bucking bar against the tail or a hard working surface. The bucking bar is a specially shaped solid block of metal. The rivet gun provides a series of high-impulse forces that upsets and work hardens the tail of the rivet between the work and the inertia of the bucking bar. Rivets that are large or hard may be more easily installed by squeezing instead. In this process a tool in contact with each end of the rivet clinches to deform the rivet.
Rivets may also be upset by hand, using a ball-peen hammer. The head is placed in a special hole made to accommodate it, known as a rivet-set. The hammer is applied to the buck-tail of the rivet, rolling an edge so that it is flush against the material.
Testing
Solid rivets for construction
A hammer is also used to "ring" an installed rivet, as a non-destructive test for tightness and imperfections. The inspector taps the head (usually the factory head) of the rivet with the hammer while touching the rivet and base plate lightly with the other hand and judges the quality of the audibly returned sound and the feel of the sound traveling through the metal to the operator's fingers. A rivet tightly set in its hole returns a clean and clear ring, while a loose rivet produces a recognizably different sound.
Testing of blind rivets
A blind rivet has strength properties that can be measured in terms of shear and tensile strength. Occasionally rivets also undergo performance testing for other critical features, such as pushout force, break load and salt spray resistance. A standardized destructive test according to the Inch Fastener Standards is widely accepted.
The shear test involves installing a rivet into two plates at specified hardness and thickness and measuring the force necessary to shear the plates. The tensile test is basically the same, except that it measures the pullout strength. Per the IFI-135 standard, all blind rivets produced must meet this standard. These tests determine the strength of the rivet, and not the strength of the assembly. To determine the strength of the assembly a user must consult an engineering guide or the Machinery's Handbook.
Alternatives
- Adhesives
- Bolted joints
- Brazing
- Clinching
- Folded joints
- Nails
- Screws
- Soldering
- Welding
Source: wikipedia.org
